
Bumping and Grinding
(a Trooper story)
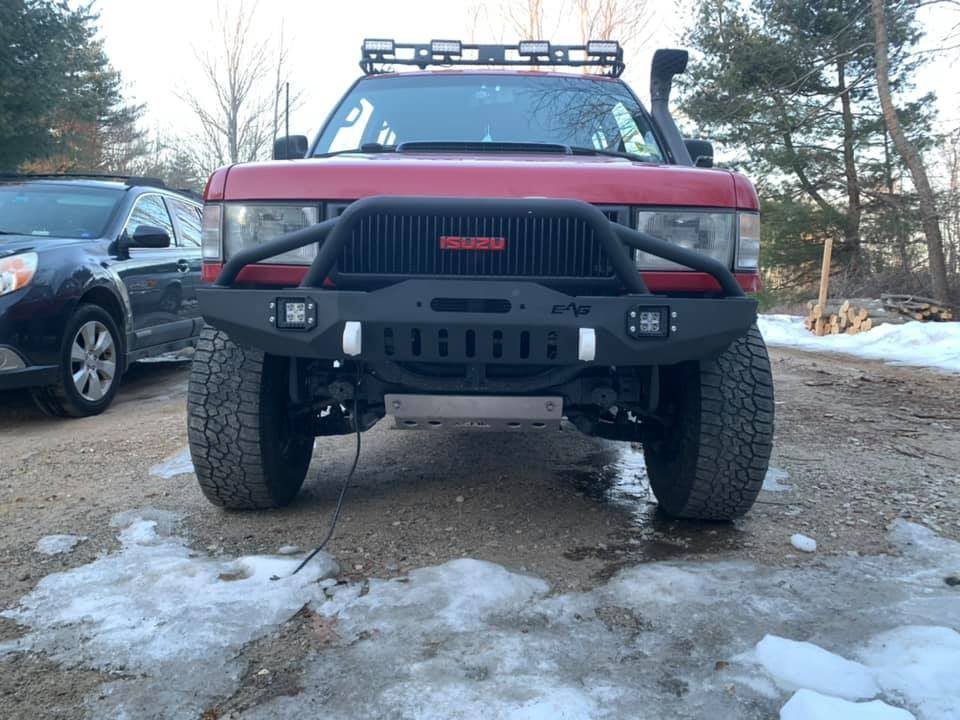
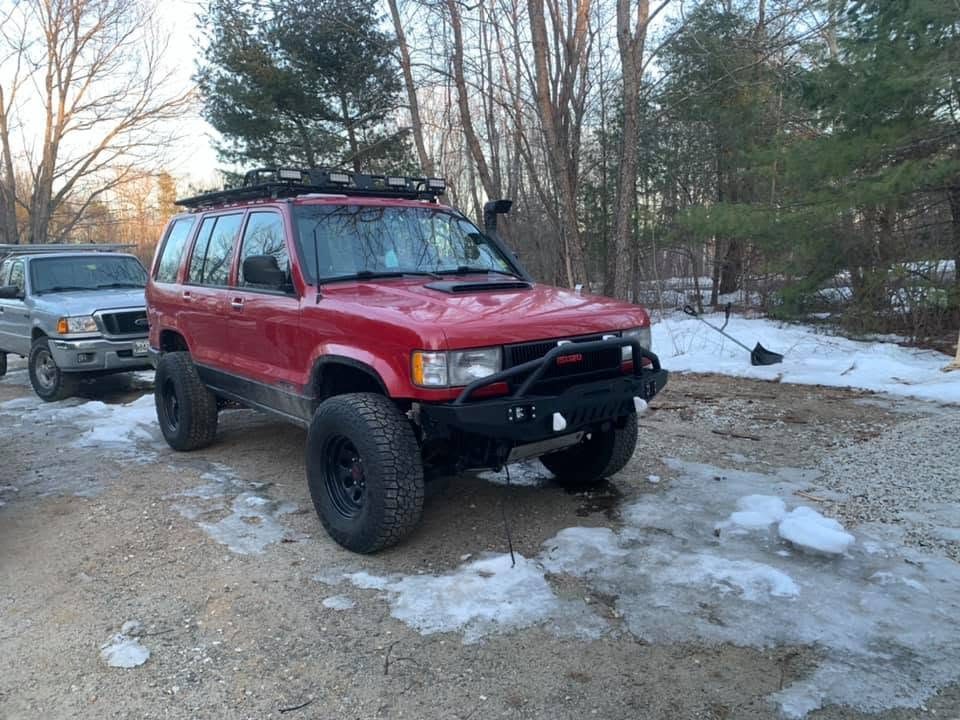
One day steel bumper mod for an Isuzu Trooper. A $400 Jeep XJ bumper, flipped brackets, and a floor jack.
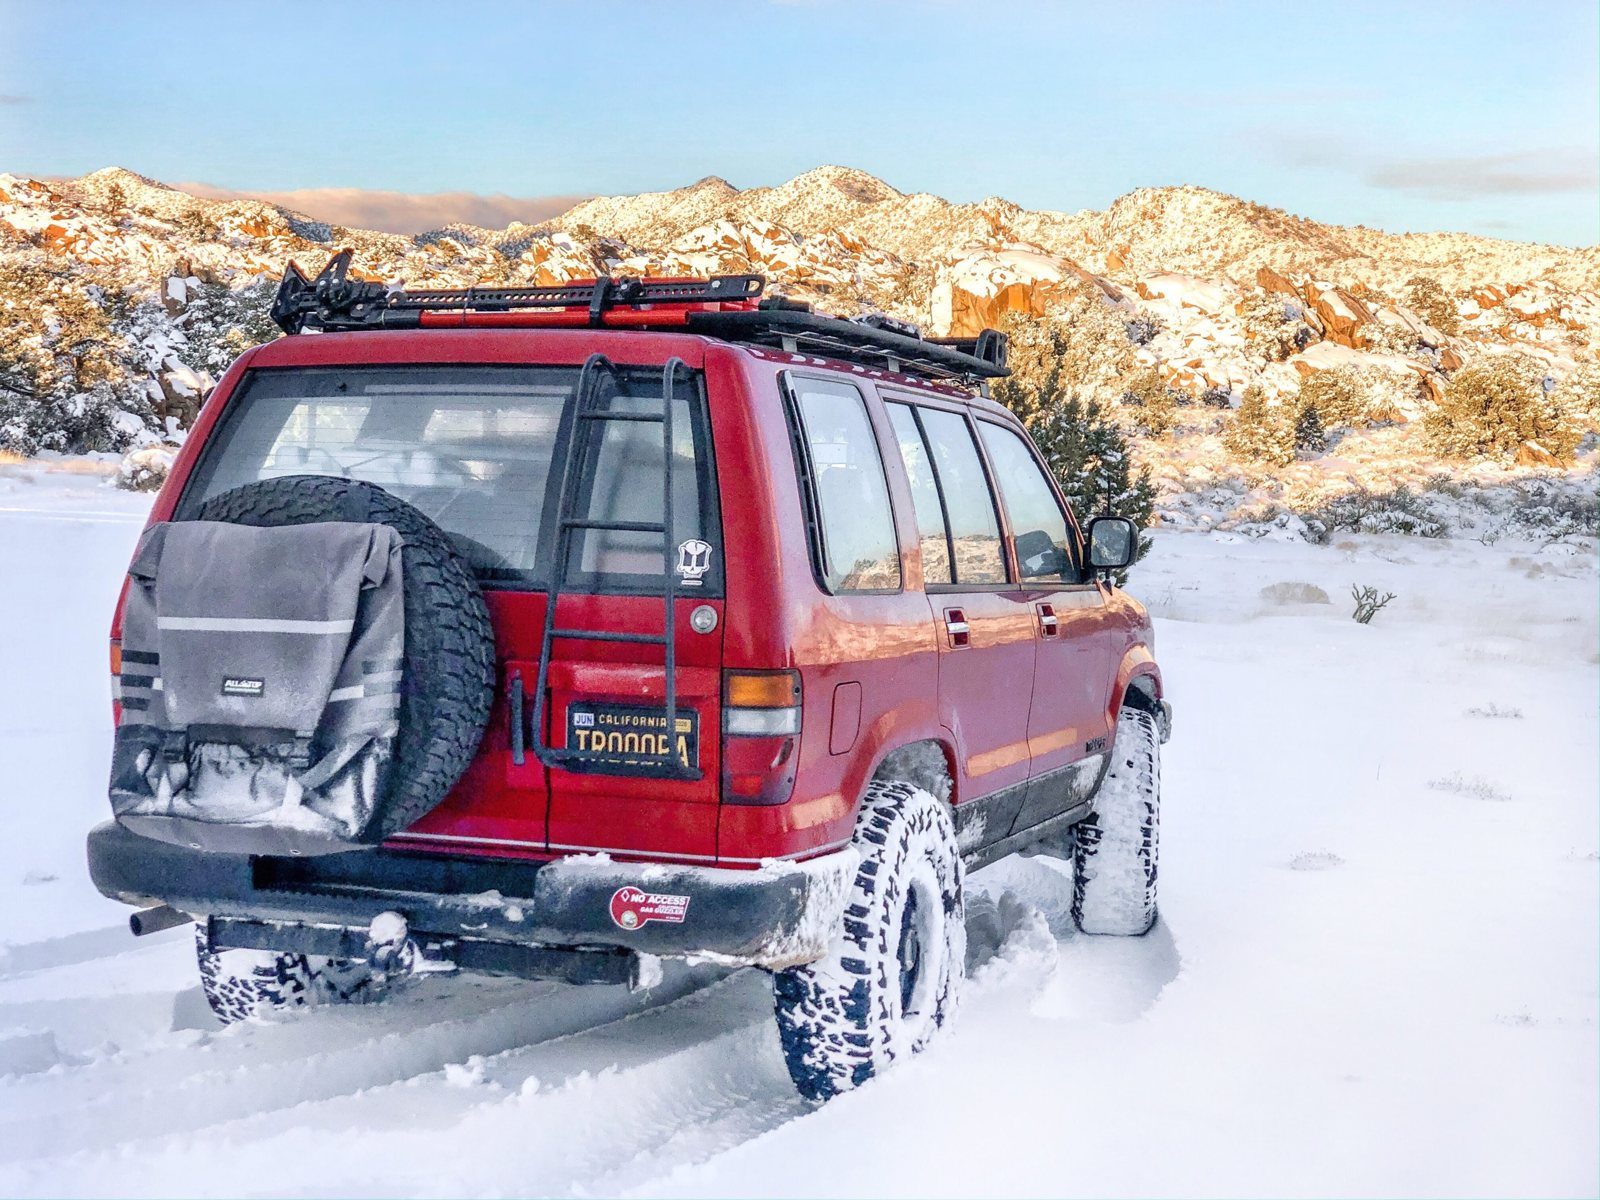
"There ain't nothing wrong with a little bump and grind." Some dude who is definitely not in prison right now. If ya know ya know.
Ok SO!! If you know me that means we have an understanding. I like risk. Now, am I leaning full tilt, hold my juice box, into some half-thought-out idea Erik tosses out into the ethos-sphere and guaranteed to land the both of us into a truxican standoff with the local SWAT team? No, not these days. 20 years ago… well, that was 20 years ago. These days the risk I choose to take on is typically mechanical and comes at the expense of a few zeros. This bumper build is one pretty standard but low-dollar example. This is a quick, dirty, had-never-been-done but has-since-been-replicated ONE DAY MOD: a classic square-body Cherokee EAG bumper mildly modified to fit a 1993 Isuzu Trooper.
This is what Nate did to his own truck, not a kit and not instructions for yours. A bumper is structural: the winch, the recovery points and the first thing you hit all hang off it. If you copy this, the fit, the welds and the risk are yours. LRDT accepts no liability for anything you build from this post.
Why a Jeep bumper fits a Trooper
How did this particular idea come about? Well, the Isuzu enthusiast community is extremely small. A small community means there is little to no aftermarket support. Buying a ready-made, bolt-on quarter-inch steel bumper is a no-go. BUT, one thing most 80s and 90s SUVs share in common is size. The early SUVs weren't like the land tanks you see eclipsing the highways and byways today. The early full-size 4x4s were built either during the U.S. oil crisis or immediately after, which means they were relatively fuel conscious, somewhat short wheelbase and, most importantly, NARROW. Early full-size SUVs also weren't nearly as popular as they are today, which created a very interesting situation. OEMs who wanted a slice of the new market without the overhead of developing a brand-unique vehicle outsourced and rebadged 4x4s from OEMs who had been successfully making SUVs for years. Vehicles like the Suzuki Jimny and Geo Tracker, or the Isuzu Rodeo and Honda Passport. So what did I do? Naturally, I googled engineering diagrams of SUV frames from the 80s and 90s and discovered that the Jeep XJ is pretty close to the Trooper's frame width, rail to rail. Now that I had my thesis, it was time to test it.
Measure your frame rails, outside to outside, where the bumper brackets land, and compare against the donor truck's. The XJ and the Trooper are close enough that flipped brackets close the gap; a few inches off and you're fabricating mounts from scratch. [Nate: the Trooper and XJ rail-to-rail numbers, if you have them.]
The fit
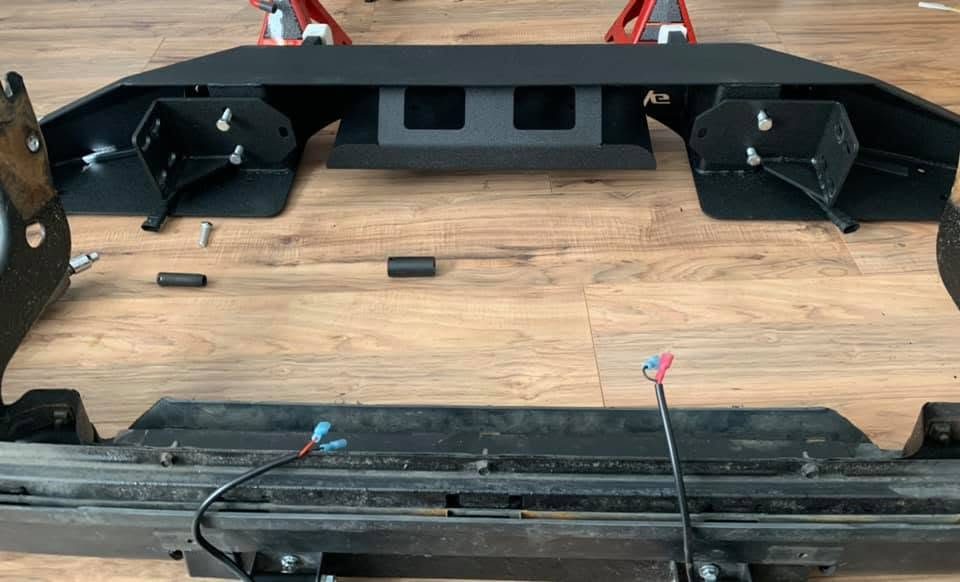
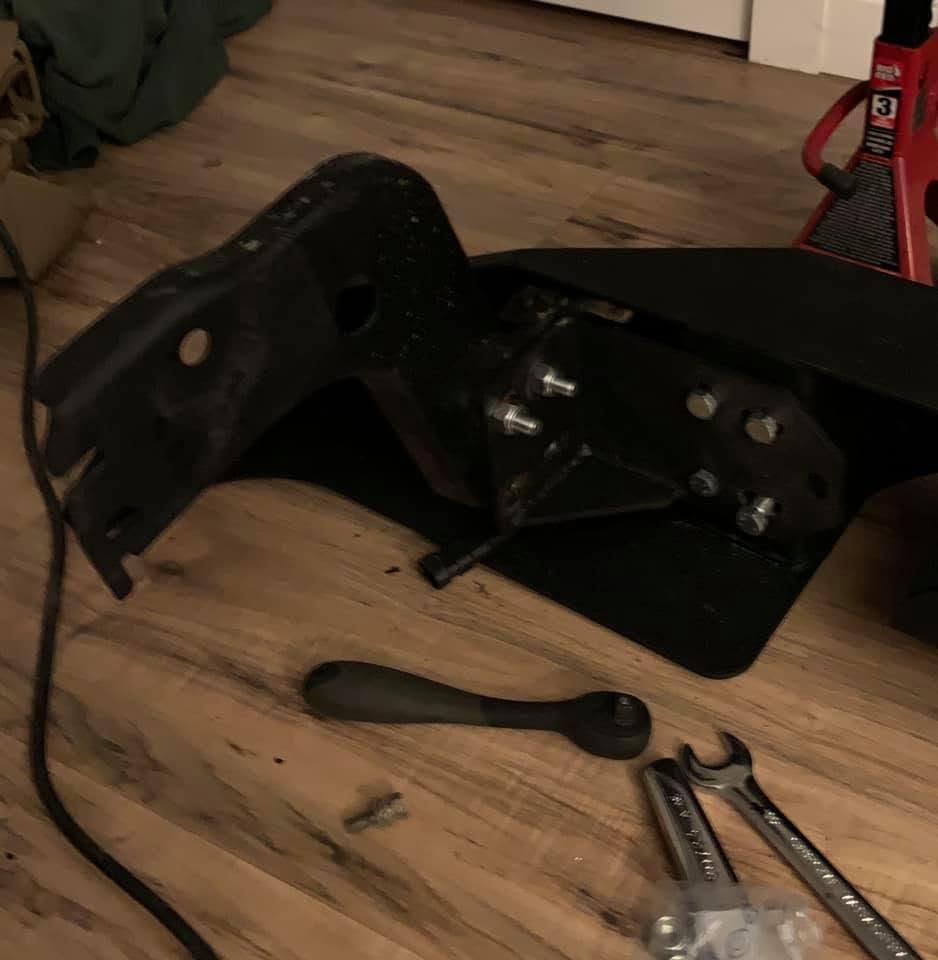
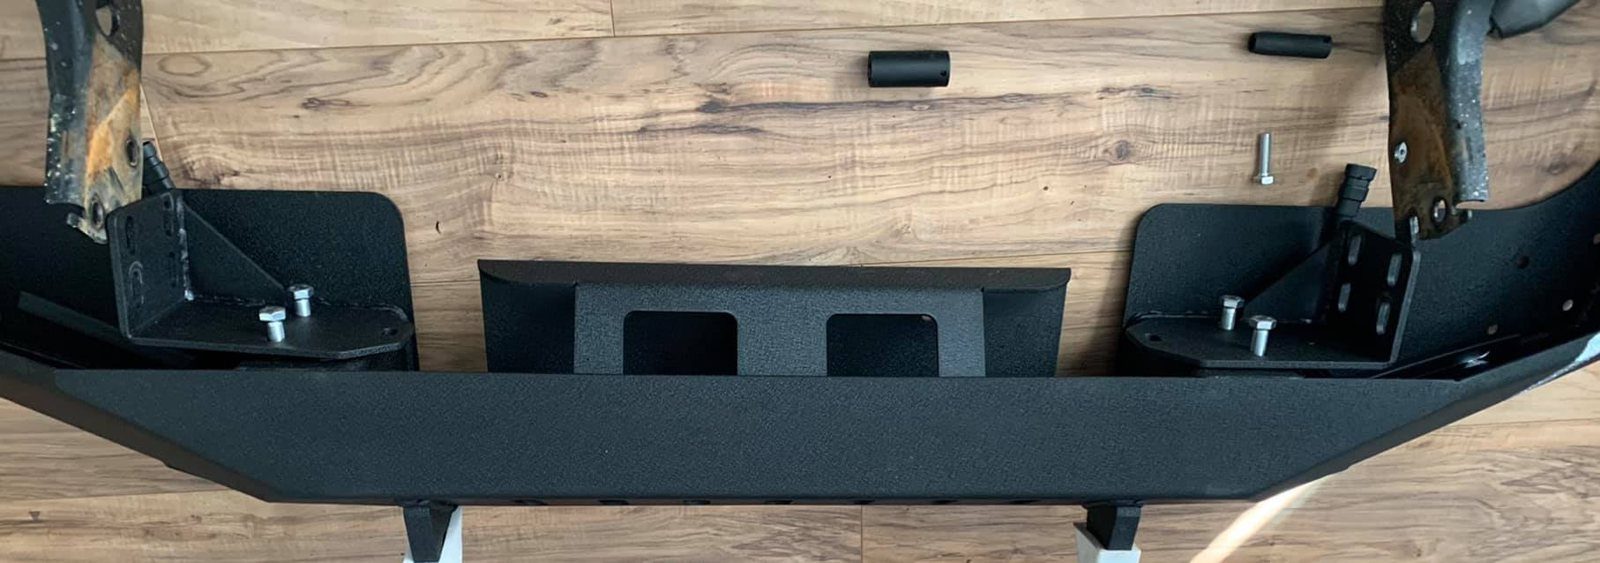
I ended up buying an EAG Jeep XJ bumper off of Amazon for $400 with the intent of fabricating and widening, if necessary, the mounting points so they would match up with the Isuzu front end. While I was fooling around with the Jeep brackets I flipped them horizontally. Sun-na-ma-beast, it's the perfect width. Flipping them closes the gap needed to match the width of the Trooper brackets, which is noticeable in one of the pics below. DOPE! To the hardware store! I needed bolts, washers and lock washers, 8 of each in M12 × 1.25. The next order of business was to disassemble and remove the OEM bumper, then drill 4 holes in each of the Trooper's bumper mount brackets to line up with the 4 holes on the Jeep bracket that were meant for the bumper. Flipped, the Jeep brackets also needed two new holes each so they could bolt to the bumper. After that it was as simple as mating everything together with the help of a floor jack.
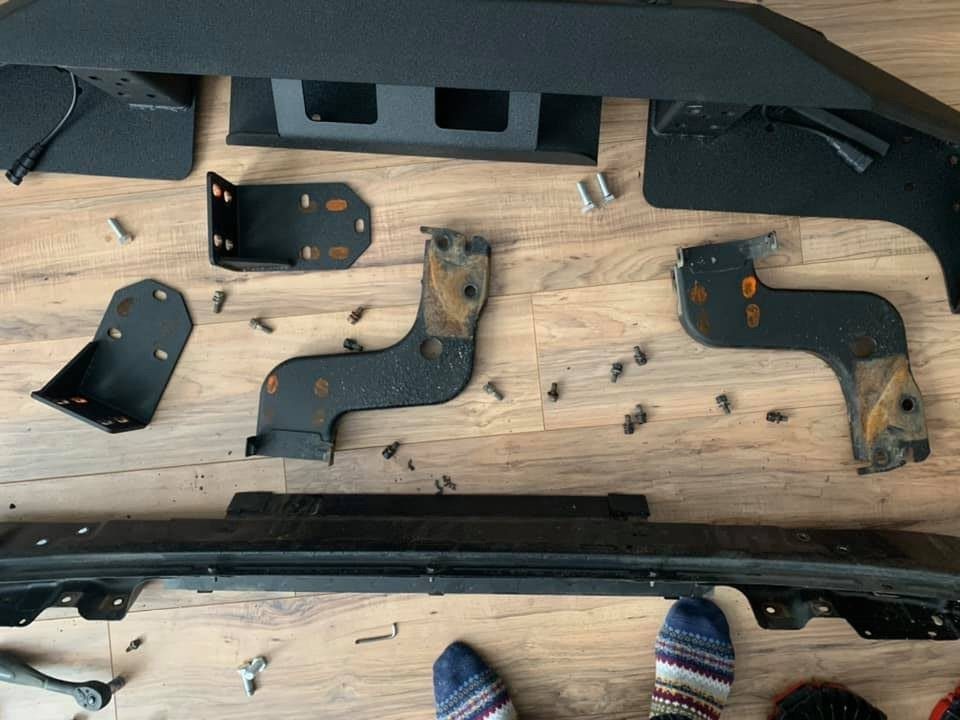
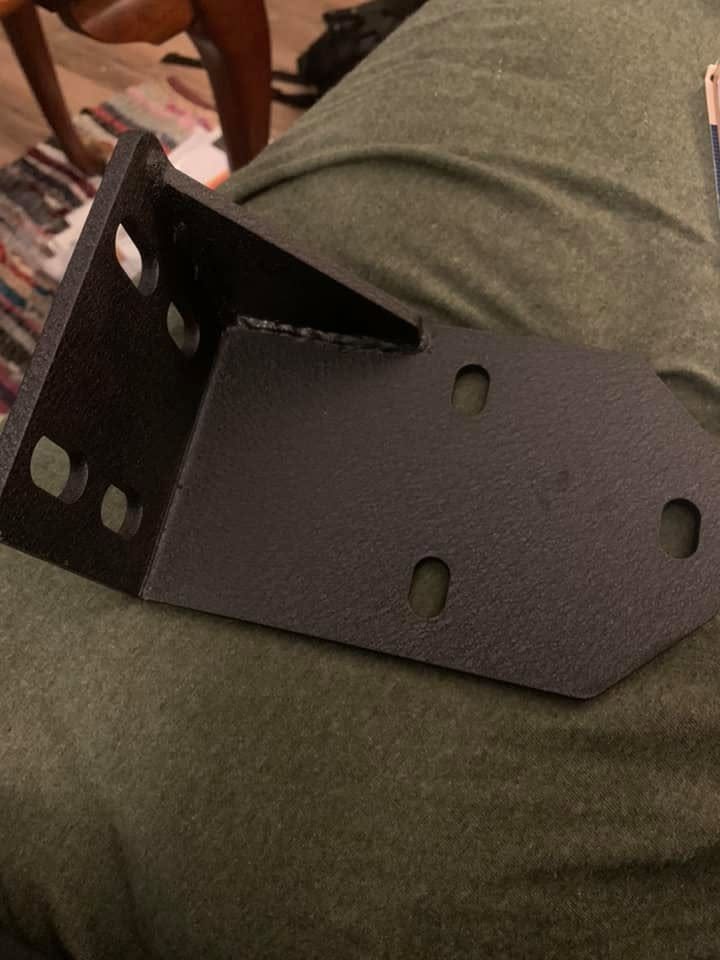
Bolt the OEM brackets to the Jeep brackets, making sure to keep them straight and in line with the Jeep bracket as best as possible, bolt to the bumper and test fit. Adjust as necessary.
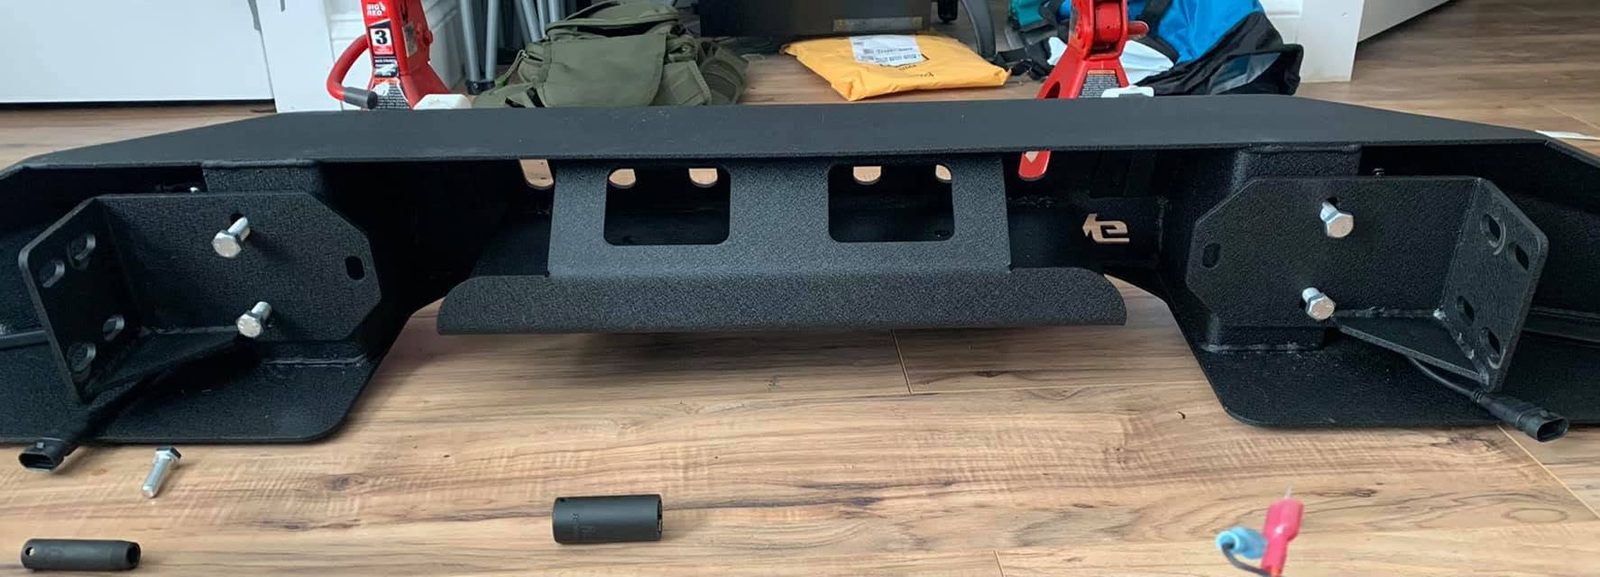
Trim, tilt, weld
You may need to cut the bumper down a bit in the rear where it slides under the grille, and on the outer corners she is a bit long, reaches farther back and bumps up against the fenders. To correct that I just loosened up the bolts and tilted it a bit. Bolted up with 16 bolts in all, before any welding, she didn't rattle or move. Once fitment was finished I welded everything together and left the bolts marrying the mount brackets and the bumper in place to act as insurance against breakage.
Order of work
- Pull the OEM bumper and unbolt the Trooper's bumper brackets from the bar.
- Flip the Jeep brackets horizontally and offer them up to the Trooper brackets. The flip is what makes the widths match.
- Drill four holes in each Trooper bracket to line up with the Jeep bracket's four bumper holes, and two new holes in each Jeep bracket so it bolts to the bumper flipped.
- Bolt the Trooper brackets to the Jeep brackets, straight and in line, with the bumper on the floor.
- Lift the assembly onto the frame with a floor jack and bolt the Trooper brackets back to the truck. Test fit. Trim the rear edge where it slides under the grille; tilt the bumper on its bolts if the outer corners reach the fenders.
- Weld it all together. Leave the bolts in as insurance.
A year later
Over the course of a year I ended up tearing the bumper down and welding on additional support brackets that bolted to locations readily available on the frame.
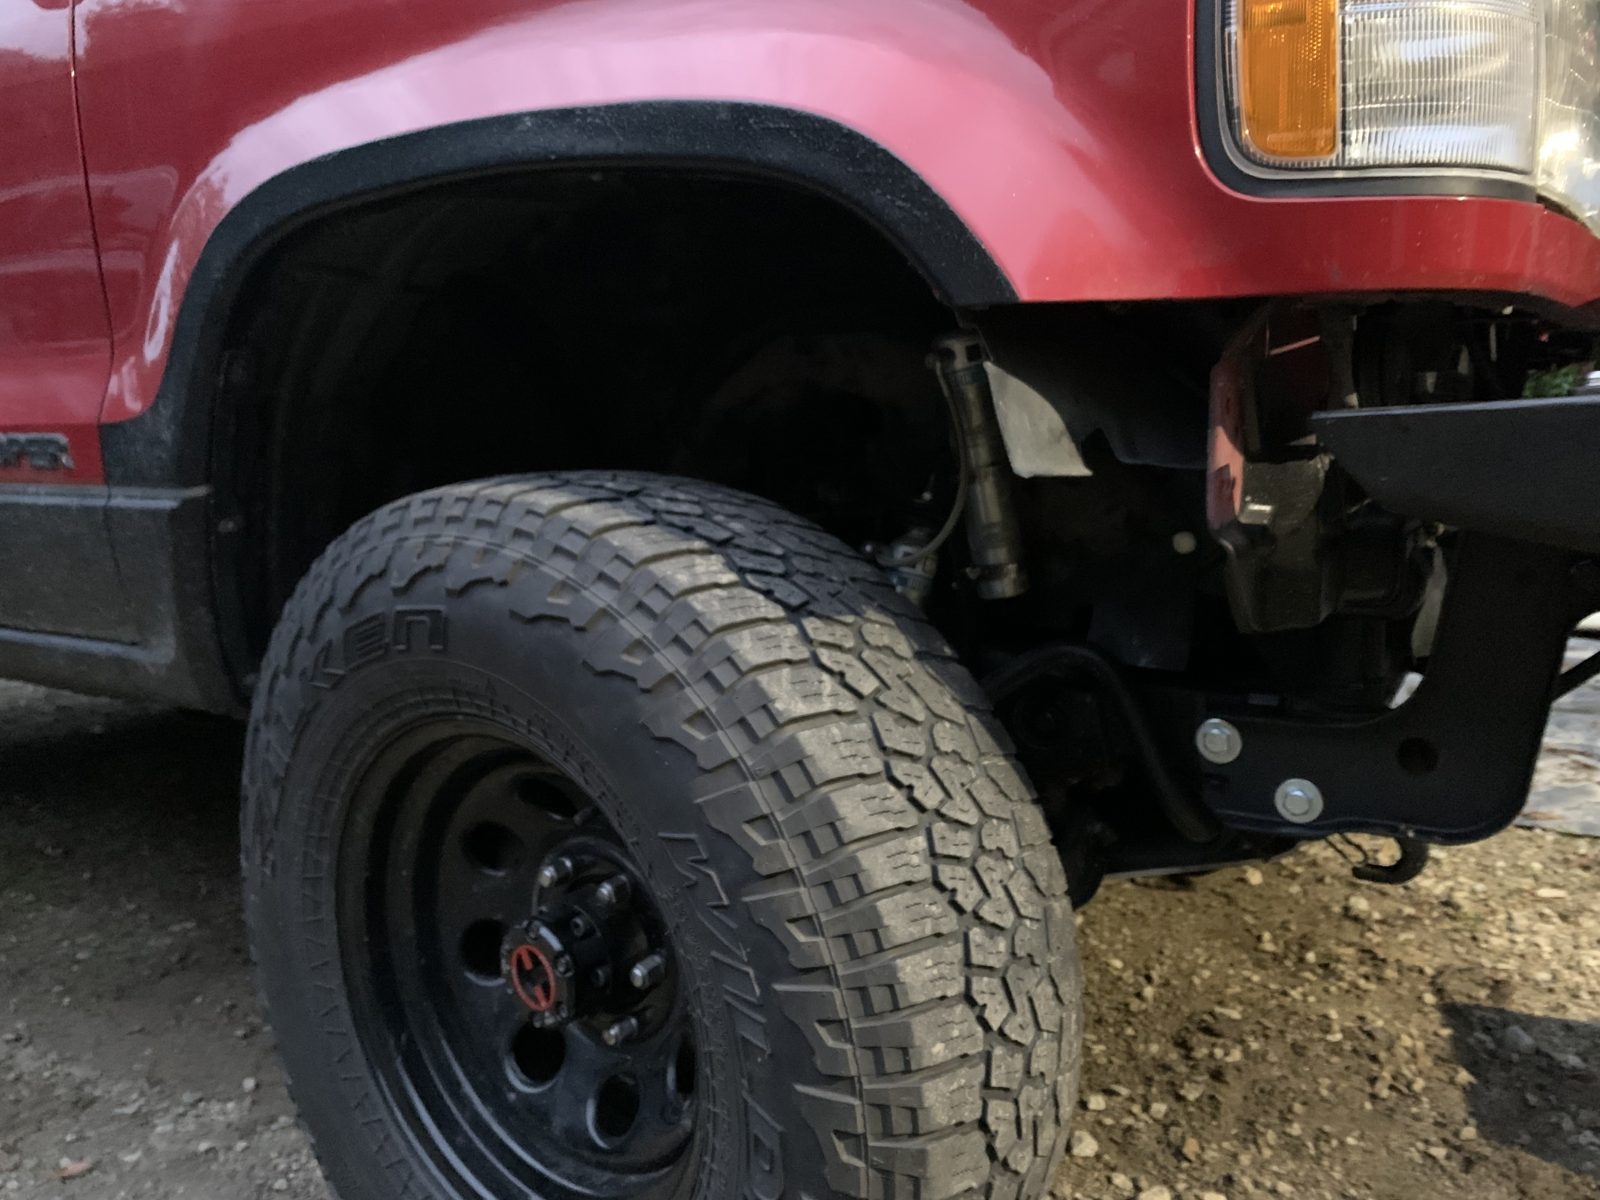
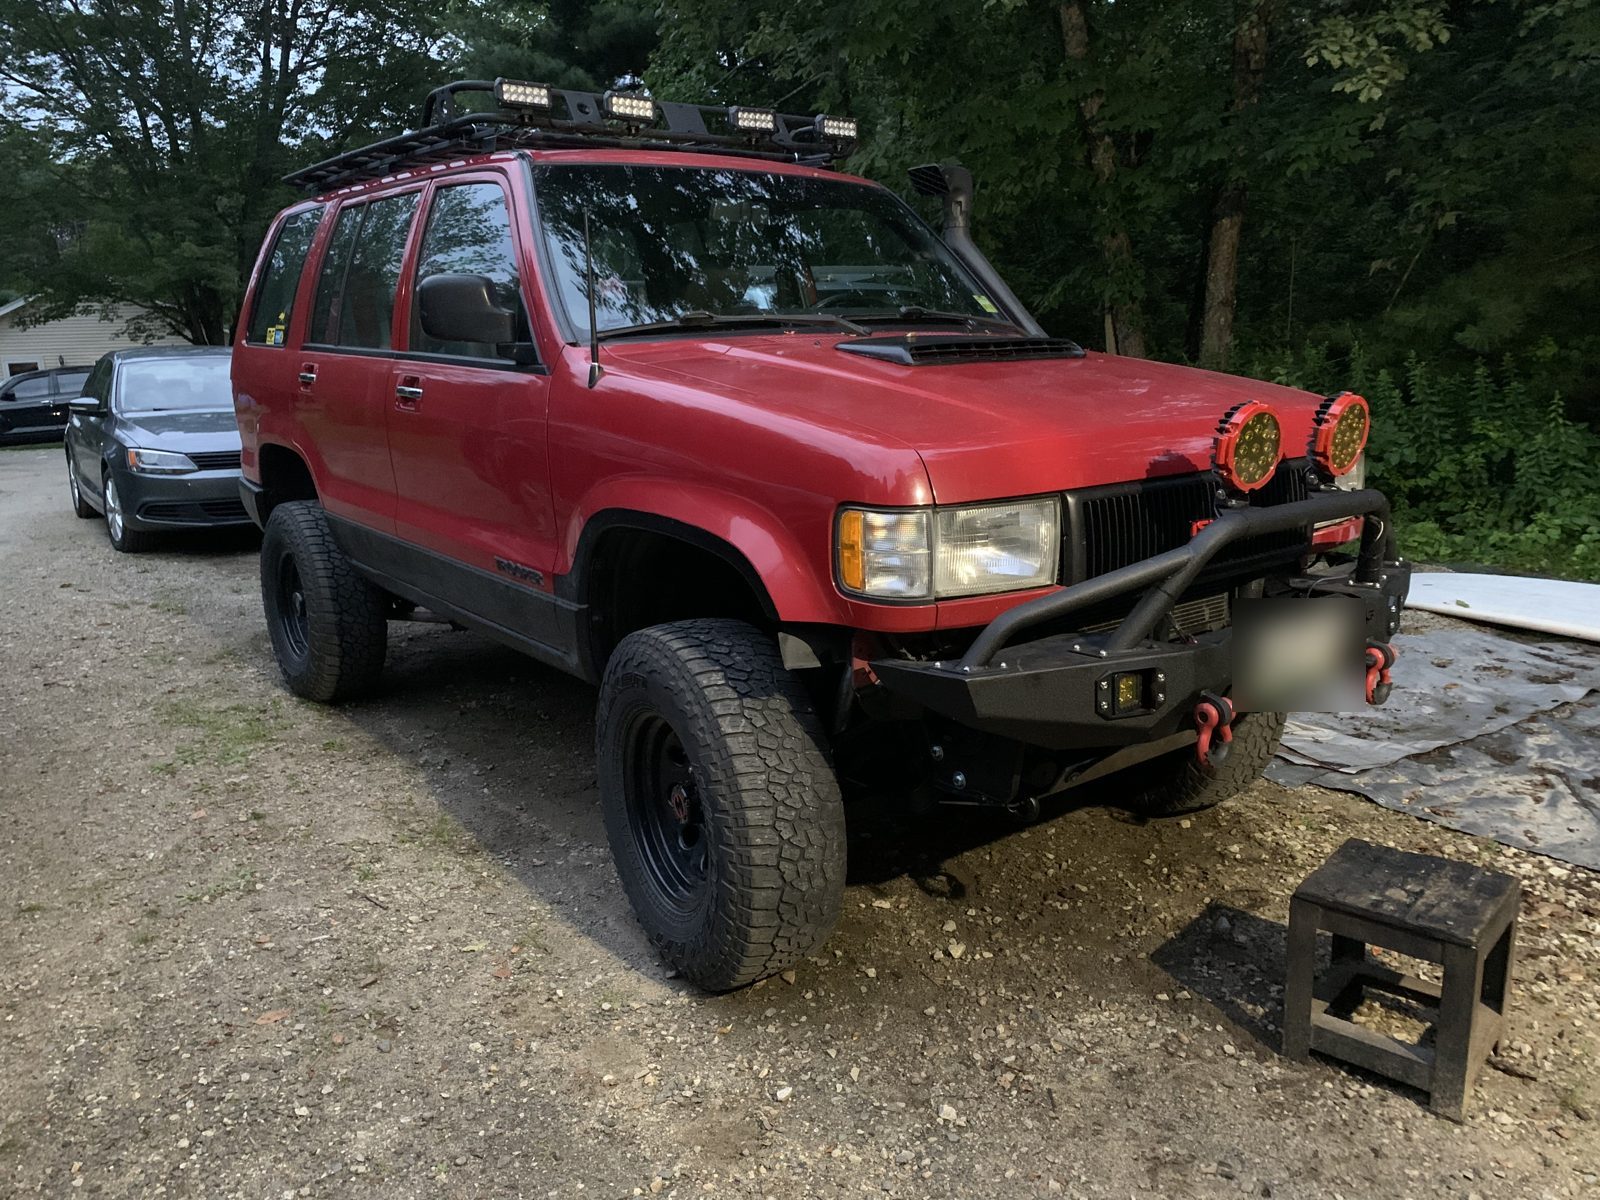
[Nate: what the extra brackets are made of, where on the frame they bolt, and what made you add them. A winch, a hit, or just not trusting four bolts a side?]
Parts and tools
| Part | What to look for | Role |
|---|---|---|
| EAG Jeep XJ front bumper | The classic square-body Cherokee bumper, about $400 on Amazon | The bumper |
| Bolts, flat washers, lock washers | M12 × 1.25, 8 of each. [Grade and length.] | The bracket mod: Trooper brackets to Jeep brackets. 16 bolts in all hold the bumper. |
| Steel for the extra brackets | [Size and thickness.] | The year-later frame supports |
| Floor jack | Any | Holds the bumper at height while you bolt |
| Drill and bits | A 12 mm or 1/2" bit for the mount holes | Four holes per Trooper bracket, two per Jeep bracket |
| Welder | [What you ran.] | Final weld, and the extra brackets |
| Cutoff wheel or grinder | Any | Trimming the rear edge and corners |
Cost
| Line | Cost |
|---|---|
| EAG Jeep XJ bumper | $400 |
| Hardware | [ ] |
| Steel for the extra brackets | [ ] |
| Total | [ ] |
Against that, a made-for-it quarter-inch steel bumper for a Trooper doesn't exist, and the closest thing on another truck runs [what a comparable bolt-on bumper costs].
Lessons
- Flip the brackets before you fabricate. The whole mod was almost a custom mount job. Turning the Jeep brackets over made it a bolt-on.
- Test fit before you cut. Bumper on the jack, brackets snug, then look at the grille and the fenders.
- Tilt before you trim. The outer corners cleared the fenders with a few degrees of tilt on the bolts, no cutting.
- Weld it, and leave the bolts in. The bolts are the backup if a weld lets go.
- Add frame brackets. On bolts alone it didn't rattle or move, and it got frame brackets anyway. [Nate: why.]
- [Nate: what you'd do differently.]
If you have questions, I'll do my best to answer. Find me on Instagram at @zupuhtroopuh.